Setting up Debian 13 on a Bluefield 2 as a standalone system
Somebody recently nudged me into the direction of NVIDIAs Bluefield 2 cards being a weird but fun system to play around with, so I did exactly that and I wanted to get rid of the vendor kernel and instead use a modern(ish) distro with a mainline kernel. Funnily enough that wasn’t actually too hard.
In my case I got some DELL cards, part number 0JNDCM. They have 32GB of memory and 128GB of EMMC storage. Unfortunately the EMMC is highly redundant, which means that only about 40GB of storage is actually usable, and it’s definitively not the fastest.
Due to some missing kernel modules during installation you’ll need both the RJ45 port as well as one of the SFP28 ports connected. Link speed on the SFP28 doesn’t really matter as long as it’s compatible with the ConnectX-5.
I know that in theory it would be possible to build my own BFB to provide a ready-to-use installation image, but I don’t think I’ll get so many BF2 cards that this would make sense, and I don’t really want to ship binaries as the whole point of this installation was to get rid of the vendor os and kernel.
Comparison to Raspberry Pi
- Against Raspberry Pi 4: Around 1.5x single core performance and around 6x multi core performance
- Against Raspberry Pi 5: Only around half of the single core performance and nearly identical multi core performance
It should also be a lot more stable than something like a Raspberry Pi, as both the memory as well as the onboard storage have redundancies, but it also draws a lot more power (around 24W idle).
There is no real way to expand the system with fast storage other than over the network. In theory the built-in PCIe switch should be able to act as a root complex and with a special adapter board external PCIe devices could be connected, but for now that’s only a theory.
The only expansion that should work out of the box is USB 2.0, but even that needs an adapter cable.
So in the end I only really would recommend doing this if you just want to play around with the hardware or actually need the 32GB of memory.
Flashing firmware
The card might arrive with an old configuration from the previous owner. The best way to deal with that is to begin with a clean image and apply changes from there on.
For this initial setup you’ll need a host system. Unfortunately due to the nature of this being a weird PCIe device that stalls for a while before becoming actually a usable device it doesn’t work in all systems, they just freeze on boot. A few tests showed me that it mostly works when resetting the frozen host BIOS using Ctrl+Alt+Del, as that doesn’t seem to interrupt power to the card, so on the next try it’s available instantly.
Now that the host system is booted and sees the card in lspci we need two pieces of software:
- NVIDIAs BF-Bundle
- rshim-user-space (surprisingly this is packaged in both Debian and NixOS)
and install
rshim-user-space
Run rshim -f, you should see something like this:
[root@nixos:~]# nix-shell -p rshim-user-space

[nix-shell:~]# rshim -f
Created PID file: /var/run/rshim.pid
Registering device IDs with driver: /sys/bus/pci/drivers/vfio-pci
Probing pcie-0000:05:00.3(vfio)
Create rshim pcie-0000:05:00.3
rshim0: failed to get vfio device 0000:05:00.3
rshim0 fall-back to uio
pcie-0000:05:00.3 enable
rshim0 attached
Now we can install the firmware bundle using: bfb-install --bfb bf-fwbundle-3.3.0-202_26.01-prod.bfb --rshim rshim0 (exchange the fwbundle name with the one you downloaded).
In my case on NixOS this prints a few errors about bf-reg not being found, but that doesn’t seem to be an issue.
The installation takes a few minutes and starts printing log lines after a while:
[nix-shell:~]# bfb-install --bfb bf-bundle-3.3.0-202_26.01_ubuntu-24.04_64k_prod.bfb --rshim rshim0
Checking if local host has root access...
Checking if rshim driver is running locally...
/nix/store/prwj64h2bhslf1k255ri5sl2niaphz87-rshim-user-space-2.5.7/bin/.bfb-install-wrapped: line 197: bf-reg: command not found
/nix/store/prwj64h2bhslf1k255ri5sl2niaphz87-rshim-user-space-2.5.7/bin/.bfb-install-wrapped: line 201: bf-reg: command not found
/nix/store/prwj64h2bhslf1k255ri5sl2niaphz87-rshim-user-space-2.5.7/bin/.bfb-install-wrapped: line 204: bf-reg: command not found
Pushing bfb
 679MiB 0:02:29 [4,55MiB/s] [                                                                             <=>                                            ]
Collecting BlueField booting status. Press Ctrl+C to stop…
 INFO[BL2]: start
 INFO[BL2]: boot mode (rshim)
 INFO[BL2]: DDR POST passed
 INFO[BL2]: UEFI loaded
[...]
 INFO[MISC]: Installation finished
Configuring UEFI
Using screen, minicom, or any other serial terminal emulator connect to /dev/rshim0/console with a baudrate of 115200.
In my case I simply used screen /dev/rshim0/console 115200, which worked mostly fine. Sometimes after rebooting the card
input seemed to be garbled a bit, but killing the session (Ctrl+a, k) and starting it again fixed that.
On another terminal run echo SW_RESET 1 > /dev/rshim0/misc
You should start seeing log output like this:
Mellanox BlueField-2 A1 BL1 V1.1
NOTICE:  Configure Chip Info
NOTICE:  BL2R: v2.2(release):4.14.0-5-g6e80f22f0
NOTICE:  BL2R: Built : 21:32:23, Feb 10 2026
NOTICE:  BL2R built for hw (ver 1)
NOTICE:  BL2R: Booting BL2
NOTICE:  BL2: v2.2(release):4.14.0-5-g6e80f22f0
NOTICE:  BL2: Built : 21:32:22, Feb 10 2026
NOTICE:  BL2 built for hw (ver 1)
NOTICE:  Running as 0JNDCM system
NOTICE:  No SPD detected on MSS0 DIMM0
NOTICE:  No SPD detected on MSS0 DIMM1
NOTICE:  Finished initializing DDR
NOTICE:  DDR POST passed.
NOTICE:  BL31: v2.2(release):4.14.0-5-g6e80f22f0
NOTICE:  BL31: Built : 21:32:22, Feb 10 2026
NOTICE:  BL31 built for hw (ver 1), lifecycle GA Secured

[...]

Mellanox BlueField-2 [A1] A72(D08) 8 Cores r1p0

Memory Information:
DDR4 Memory Available: 32 GB Operating Frequency: 3200 MT/s
Current Secure Boot State: enabled
Secure Boot Mode         : User Mode
PK is  configured
Redfish enabled
DPU BMC version: BF-23.04-3
Getting BMC UEFI Credentials...
Failed
Getting BMC Credentials...
Failed
 DHCP Session Start

Send DHCP6 SOLICIT

[...]

Press ESC/F2/DEL twice    to enter UEFI Menu.
Press ENTER               to skip countdown.
The process up to this point takes around 7 minutes, but don’t worry, we’ll speed this up considerably.
Press ESC three times (since its used for escape sequences your terminal might catch one of those presses) as soon as you see the screen with those last lines. You only have 4 seconds to react.
In some cases you might be able to catch the Ubuntu GRUB screen, in that case the
credentials to access UEFI Firmware Settings are admin / BlueField. The card
will reboot, take all the time again, but will afterwards automatically open the
UEFI configuration instead of having to smash ESC at the right time.
The default UEFI password is bluefield. You will be forced to change it when
you first access it. The new password needs to be between 12 and 64 characters.
I chose HelloNvidia3D!, which was one of the suggested passwords in their
documentation.
The screen will freeze for a moment and will come back with the UEFI configuration menu after a short while.
Select Device Manager -> System Configuration:
Enable SMMU [x]Field Mode [ ]
In the Bluefield Modes submenu select:
Internal CPU model: <Embedded>Host Privileged Mode: <Privileged>NIC mode: <DpuMode>
In the Redfish Configuration submenu select:
Enable redfish [ ]
Go back to the Device Manager, when asked if you want to save the settings press y.
Select Secure Boot Configuration and disable Attempt Secure Boot.
Go all the way back to the initial menu and power off the host system.
Accessing console via BMC
Power the host system back on. We only need it for power from here on, you can also go straight ahead and plug it into a riser with external power. I’ll describe this a bit further down.
Plug a network cable into the RJ45 port on the DPU and wait for the BMC (hostname dpu-bmc) to get a lease. This takes around 4 minutes from power up.
Before being able to do anything useful with the BMC we’ll again need to set a password, this can be done via the Redfish API:
BMC_IP=10.25.11.227

curl -k \
    -u root:0penBmc \
    -H "Content-Type: application/json" \
    -X PATCH \
    "https://${BMC_IP}/redfish/v1/AccountService/Accounts/root" \
    -d '{"Password" : "HelloNvidia3D!"}'
You should get back a message that the request was completed successfully.
Now we can access the serial console using SSH: ssh root@$BMC_IP -p 2200
Press enter and you should see localhost login: or something similar. This
is the Ubuntu system that booted on the DPU.
Install netboot.xyz
Let the system boot into Ubuntu and log in using ubuntu / ubuntu. Again you
will be forced to change the password, HelloNvidia3D! works here too.
Delete the default route over the unused internal interface and download netboot.xyz and the kernel package:
sudo ip r del default dev tmfifo_net0
echo nameserver 1.1.1.1 | sudo tee /etc/resolv.conf
sudo wget \
    -O /boot/efi/netboot.xyz-arm64.efi \
    https://boot.netboot.xyz/ipxe/netboot.xyz-arm64.efi
Booting NixOS via netboot.xyz
We are going to install Debian in the end, but we need a live-system with support for the storage device and at least one of the network interfaces on the card. NixOS provides us with this.
Enter sudo reboot into the console and re-enter the UEFI configuration.
Select Boot Manager -> EFI Internal Shell.
On the shell run netboot.xyz-arm64.efi:
Shell> fs0:
FS0:\> netboot.xyz-arm64.efi
iPXE initialising devices...
file:autoexec.ipxe... Not found (https://ipxe.org/7f4de18e)
file:/autoexec.ipxe... Not found (https://ipxe.org/7f4de18e)
The shell will stall for a while and you might even loose connection to the BMC, but it will come back and you’ll see the netboot.xyz menu.
Select Linux Network Installs (arm64) -> NixOS -> 26.05
Configure ConnectX-5
For whatever reason the embedded ConnectX-5 card starts of thinking it has 3 ports. That’s obviously wrong, the OOB port doesn’t count that’s a completely different subsystem.
While setting those paramters we can set some others too. Start of with nix-shell -p mstflint
to get the tools required.
# reset all config to default
mstconfig -d 03:00.0 -y reset

# disable pxe rom (theoretically speeds up boot)
mstconfig -d 03:00.0 -y set EXP_ROM_PXE_ENABLE=0

# set number of interfaces to 2
mstconfig -d 03:00.0 -y set NUM_OF_PF=2

# disable virtual interface to bmc
mstconfig -d 03:00.0 -y set MANAGEMENT_PF_MODE=2
Installing Debian
Before continuing make sure you have one of the SFP28 ports connected to the internet:
[nixos@nixos:~]$ ip -br a | grep 'enp3s0f[01]np[01]'
enp3s0f0np0      UP             10.25.11.231/24 [...]
enp3s0f1np1      DOWN
Enter a root shell since basically everything we run from here needs root access:
[nixos@nixos:~]$ sudo -s

[root@nixos:/home/nixos]#
Prepare storage
It would probably be possible to reuse the existing partition layout, but I like to start clean, so we repartition the disk, but before that we backup the netboot.xyz binary as we might need it again should something go wrong during the installation (e.g. forgetting to set a root password).
# copy netboot.xyz binary to /tmp
mount /dev/mmcblk0p1 /mnt
cp /mnt/netboot.xyz-arm64.efi /tmp
umount /mnt

# repartition and format storage
parted -s /dev/mmcblk0 -- mklabel gpt
parted -s /dev/mmcblk0 -- mkpart ESP fat32 1MB 256MB
parted -s /dev/mmcblk0 -- set 1 esp on
parted -s /dev/mmcblk0 -- mkpart root ext4 512MB 100%
mkfs.vfat /dev/mmcblk0p1
mkfs.ext4 /dev/mmcblk0p2

# mount storage and copy back netboot.xyz binary
mount /dev/mmcblk0p2 /mnt
mkdir -p /mnt/boot/efi
mount /dev/mmcblk0p1 /mnt/boot/efi
cp /tmp/netboot.xyz-arm64.efi /mnt/boot/efi/
fstrim -v /mnt
Install base system
Using debootstrap we can set up a basic Debian rootfs on the newly formatted storage:
nix-shell -p debootstrap --command "debootstrap trixie /mnt"
If you want to you can add a specific mirror as last parameter in the quoted debootstrap command. In my case the default mirror was actually quite slow.
Enter Debian chroot
Make some special paths available inside the new rootfs and enter a chroot
mount --bind /dev /mnt/dev
mount --bind /dev/pts /mnt/dev/pts
mount --bind /proc /mnt/proc
mount --bind /sys /mnt/sys
mount --bind /sys/firmware/efi/efivars /mnt/sys/firmware/efi/efivars
export PATH=/bin:/sbin:/usr/bin:/usr/sbin:$PATH
chroot /mnt /bin/bash
Check that you are actually in the chroot now:
root@nixos:/# head -1 /etc/os-release
PRETTY_NAME="Debian GNU/Linux 13 (trixie)"
Set root password
Start of by setting a root password, you’ll hate yourself later if you don’t do this now.
passwd root
Install some important packages
Install packages required to download and build the kernel and initramfs as well as grub to make the system actually bootable.
apt update
apt -y install \
    build-essential \
    flex \
    bison \
    bc \
    initramfs-tools \
    libncurses-dev \
    grub-efi-arm64 \
    efibootmgr \
    wget \
    locales \
    libssl-dev \
    xxd
Generate locales and set hostname
To avoid annoying locale-missing-errors it’s best to generate
some locales. At this step I also like to change the hostname,
in this case just using bluefield for that.
echo bluefield > /etc/hostname
sed -ri '/^# en_US.UTF-8/s/^# //' /etc/locale.gen
locale-gen
Create fstab
Make sure the efi partition is mounted and rootfs is writable later on:
cat > /etc/fstab << EOF
/dev/mmcblk0p2 / ext4 defaults 0 0
/dev/mmcblk0p1 /boot/efi vfat defaults 0 0
EOF
Build kernel
Now we can finally build the kernel. The build process takes around 30 minutes. If you want to set up multiple bluefield cards you could archive and distribute the built kernel to the other nodes to speed things up. Maybe even do some cool distcc stuff. Or just go make yourself a nice drink while its compiling.
The kernel config could probably also be optimized a bit more. There are a lot modules that could probably never be used on this hardware anyway. I might do some more optimizations on this in the future.
cd /root
wget https://cdn.kernel.org/pub/linux/kernel/v7.x/linux-7.0.10.tar.xz
tar xf linux-7.0.10.tar.xz
cd linux-7.0.10
CONFIG_GIST_ID=lukas2511/9b8a2ebfdbe74fc16ced3bff04d62d4d
wget \
    -O .config \
    https://gist.githubusercontent.com/${CONFIG_GIST_ID}/raw/10-config.txt
make -j10
make modules_install install
Install GRUB
Now that we have a kernel and an initramfs we can generate a GRUB config and let GRUB copy over everything it needs to boot the system.
update-grub
grub-install
Configure networking
This section contains my preferred initial network configuration. Your opinion might differ, if so please do your configuration however you like. Just keep in mind that you might want to install packages before rebooting into the OS.
I like to set static interface names via systemd:
OOB_EFIVAR=/sys/firmware/efi/efivars/OobMacAddr-8be4df61-93ca-11d2-aa0d-00e098032b8c
OOB_MAC="$(xxd -p -c 1 -s 4 ${OOB_EFIVAR} | paste -sd:)"

cat > /etc/systemd/network/10-g1p0.link << EOF
[Match]
MACAddress=${OOB_MAC}

[Link]
Name=g1p0
EOF

cat > /etc/systemd/network/10-g25p0.link << EOF
[Match]
MACAddress=$(cat /sys/class/net/enp3s0f0np0/address)

[Link]
Name=g25p0
EOF

cat > /etc/systemd/network/10-g25p1.link << EOF
[Match]
MACAddress=$(cat /sys/class/net/enp3s0f1np1/address)

[Link]
Name=g25p1
EOF

cat > /etc/systemd/network/10-rshim0.link << EOF
[Match]
MACAddress=00:1a:ca:ff:ff:01

[Link]
Name=rshim0
EOF

cat > /etc/systemd/network/30-g1p0.network << EOF
[Match]
Name=g1p0

[Network]
DHCP=yes
EOF

systemctl enable systemd-networkd
At this point you might also want to install an SSH server and configure your authorized keys.
Reboot into Debian
Simply type reboot and around 2 minutes later your system should be up and running.
During the reboot you’ll see a lot of errors about MLNXBF17, you can ignore those, the new kernel won’t have that issue.
Rescue shell
If you messed up and want to get back into the chroot just boot NixOS again and paste this into the console:
sudo mount /dev/mmcblk0p2 /mnt
sudo mount /dev/mmcblk0p1 /mnt/boot/efi
sudo mount --bind /dev /mnt/dev
sudo mount --bind /dev/pts /mnt/dev/pts
sudo mount --bind /proc /mnt/proc
sudo mount --bind /sys /mnt/sys
sudo mount --bind /sys/firmware/efi/efivars /mnt/sys/firmware/efi/efivars
sudo PATH=/bin:/sbin:/usr/bin:/usr/sbin:$PATH chroot /mnt /bin/bash
Installing further kernel modules
While the system is up and running there are still some kernel modules that you might want to install.
- mlx-trio: Not exactly sure what it does, something about PCIe and interrupts
- ipmb_host: Allows for communication with the BMC
- mlxbf-pka: Absolutely no idea what it does. It has something to do with the crypto processor, but it doesn’t seem to change anything
TODO
Standalone operation
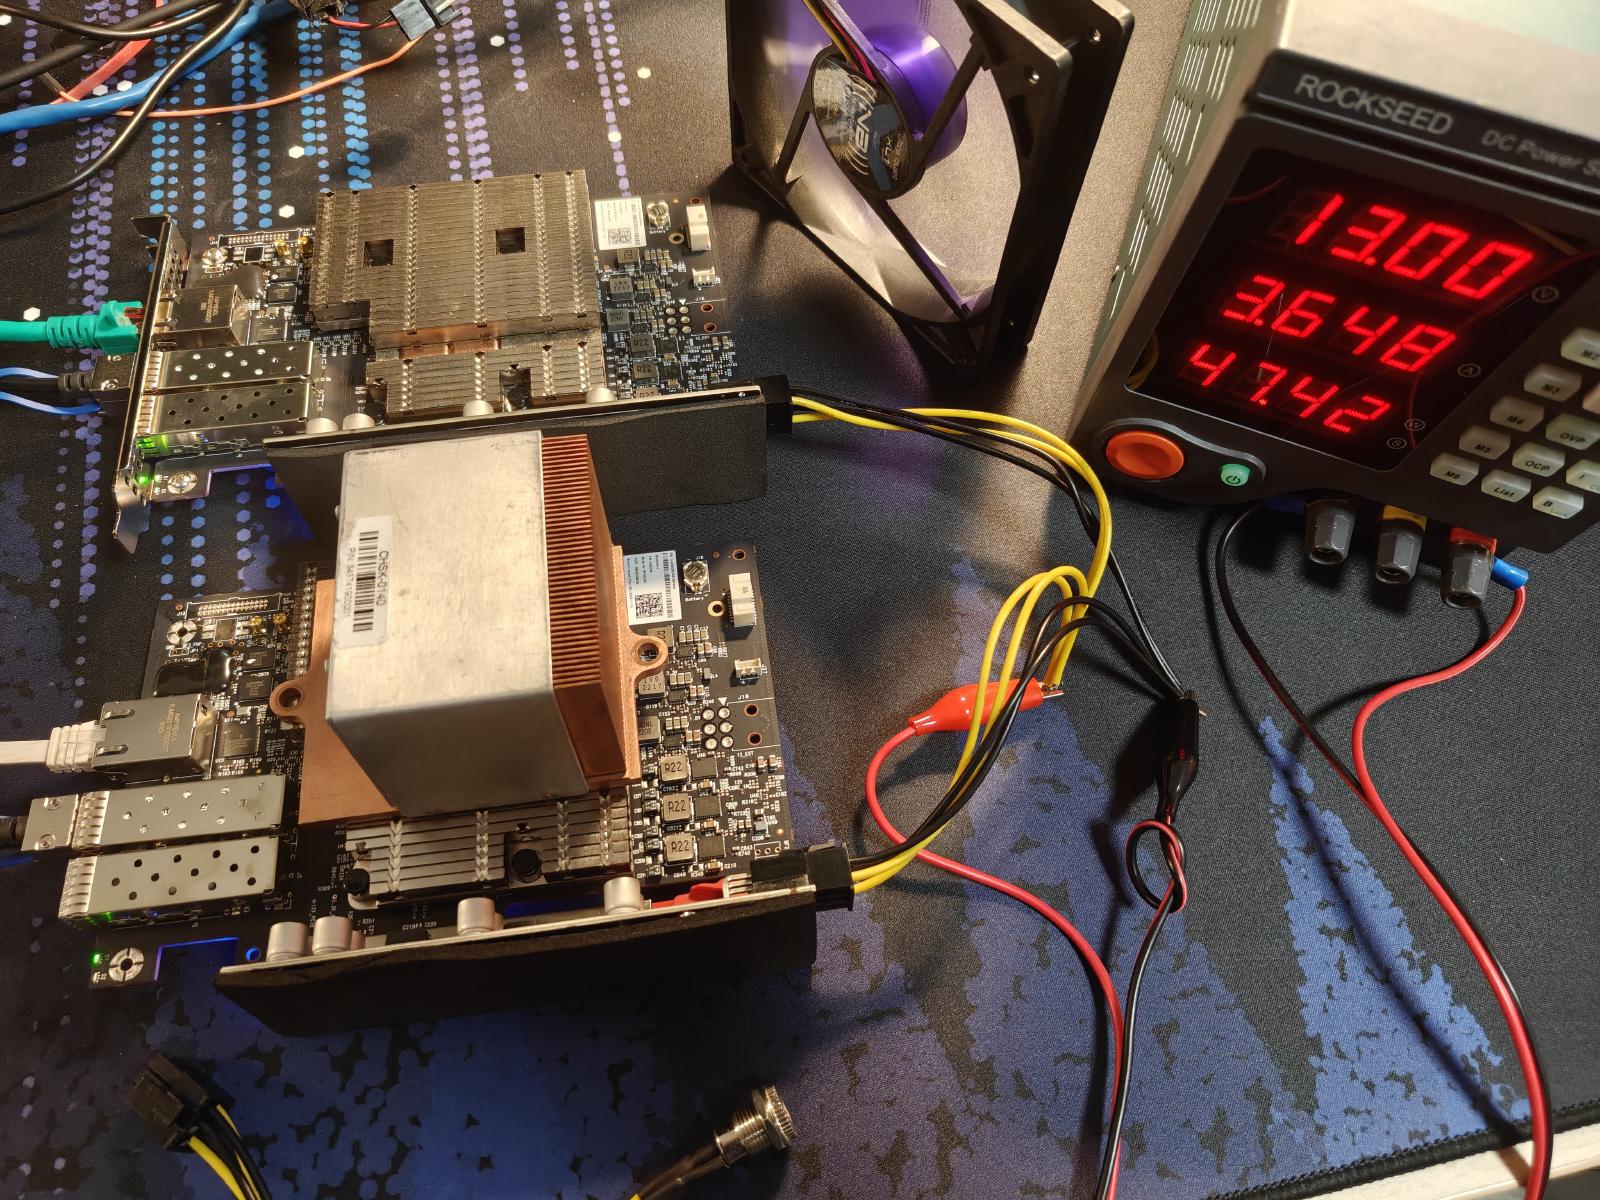
The card needs to be supplied with power. For now I’m using some cheap Bitcoin Mining PCIe risers that use USB cables for PCIe signalling and take 12V input. I simply left the USB cable unplugged and only connected power. The board seems to max out at around 3.5A.